Project Updates & Progress
Building the Ultimate Haunted Entrance
Posted on 2025-05-22 21:47:53
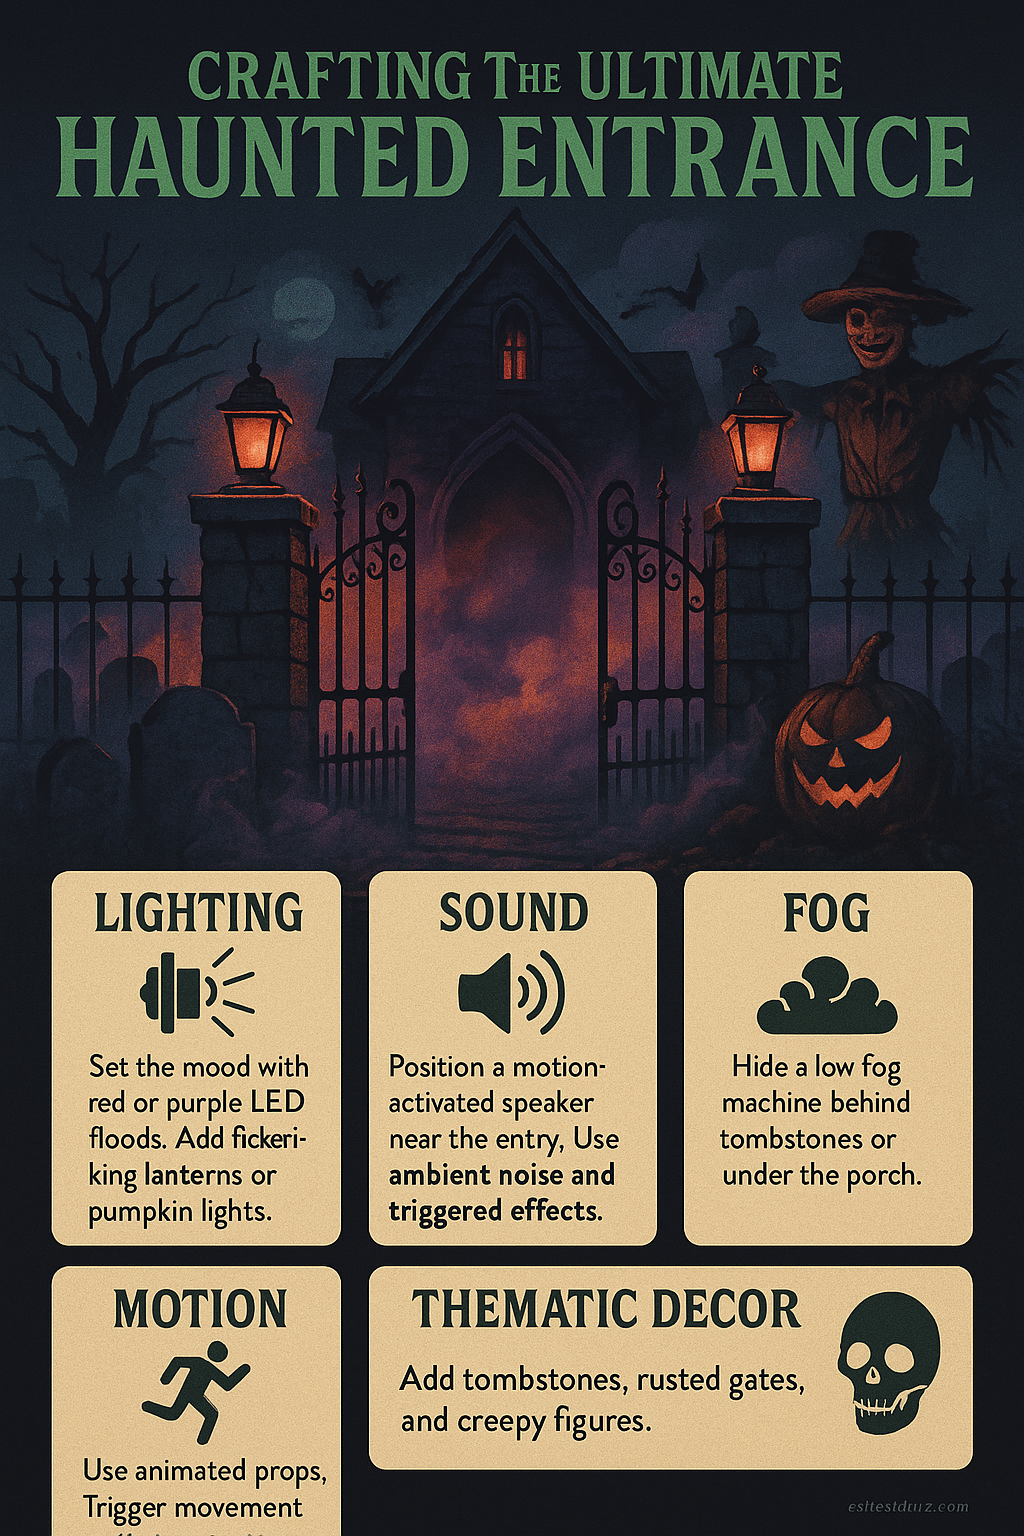
Creating an unforgettable first impression begins with your haunted entrance. This is the first and last thing guests will experience, so make it count. To build an ultimate entrance, consider layering elements: sound, lighting, fog, motion, and thematic decor. Start by setting the mood with ambient lighting. Use red or purple LED floods to cast eerie shadows across tombstones or a rusted gate. Add flickering lanterns or pumpkin lights to guide your visitors' eyes through the space. Next, use sound. A motion-activated speaker near the entry can trigger howls, whispers, or distant screams as guests approach. Layer your audio to avoid repetition—use ambient background noise on a loop and key effects on triggers. Fog adds atmosphere and helps conceal mechanics. A low fog machine with ground chillers creates a rolling mist that hugs the ground. Position it behind tombstones or under the porch for maximum diffusion. Add motion elements to surprise and delight. Servo-driven heads or arms, animated scarecrows, or jumping spiders are excellent choices. Trigger them via motion sensors or custom scripts on your Halloween Portal. Your entrance sets the tone. Use your device scripts and control system to time the scares, build suspense, and create a truly immersive experience.
Using Motion Sensors for Maximum Scares
Posted on 2025-05-22 21:47:53
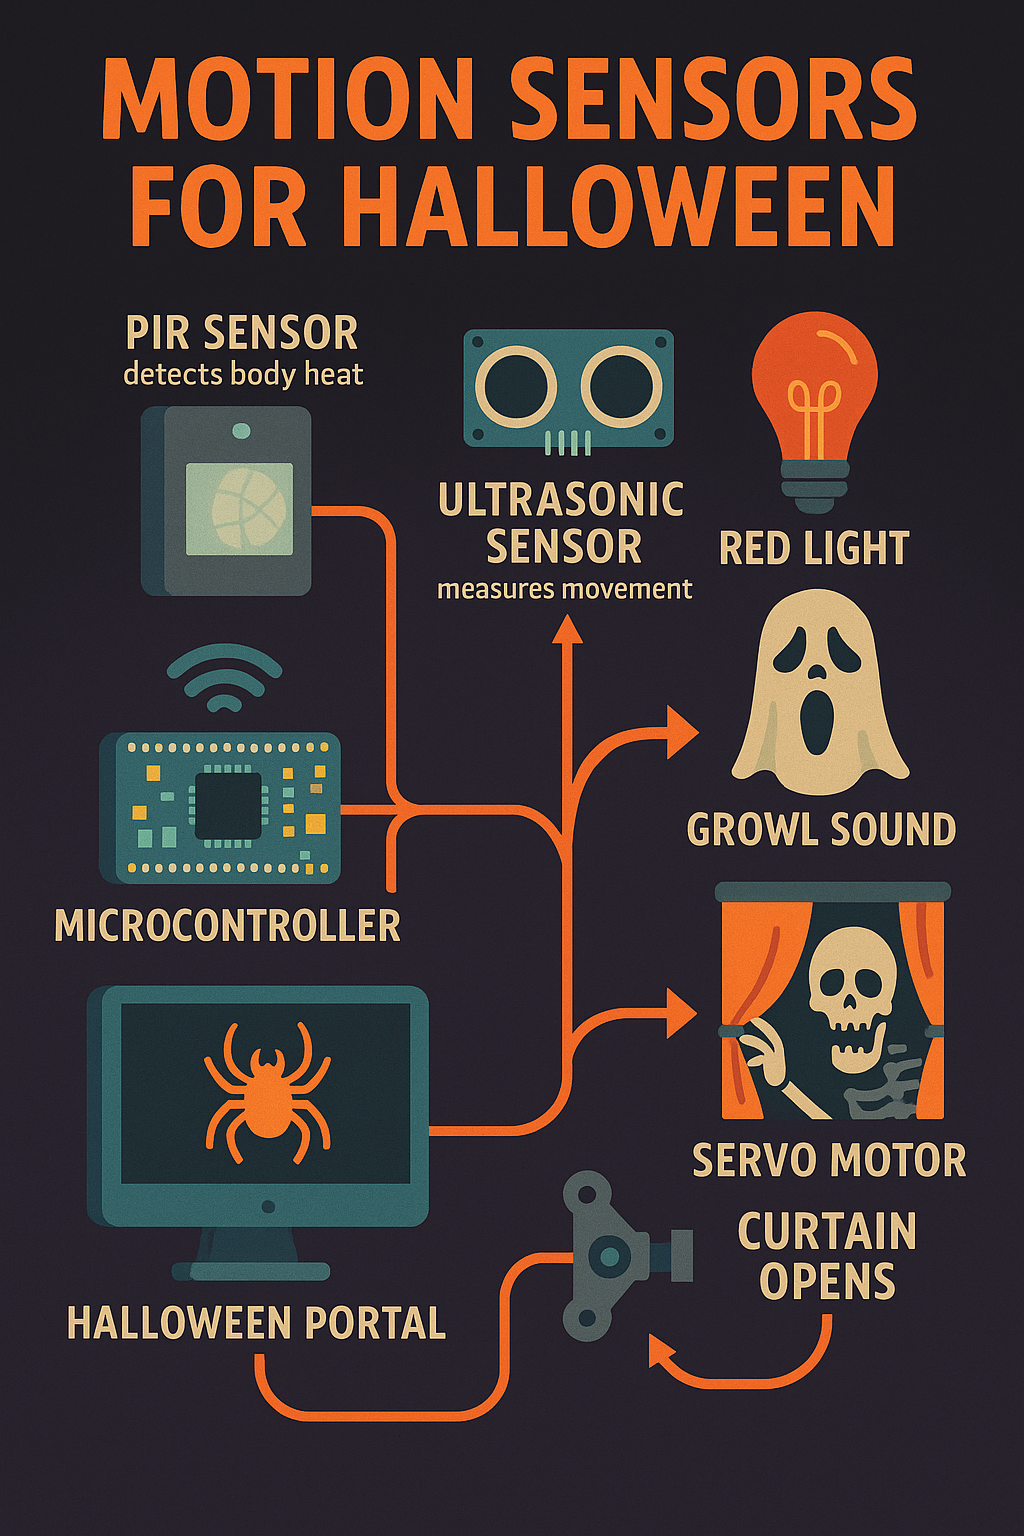
Motion sensors are one of the most versatile tools in your Halloween toolkit. They bring your haunt to life by reacting to visitors in real time. When used properly, they allow for subtle ambiance shifts or full-on jump scares that activate precisely when your guest is vulnerable. There are different types of sensors available: PIR (Passive Infrared) sensors detect body heat, while ultrasonic sensors measure movement by bouncing sound waves. PIR sensors are great for tight corridors and entry points, while ultrasonic is better for larger or irregular zones. Connect your sensor to a microcontroller (like an ESP8266 or Arduino) and register it in your Halloween Portal dashboard. You can then assign scripts to activate when the sensor is triggered. For example, you might program a script to activate a red light, followed by a growl sound and a servo motor pulling open a curtain. Staggering events like this builds tension and makes the experience more dynamic. Avoid false positives by angling the sensor away from pets, trees, or constant traffic. Add a cool-down time so your devices don’t re-trigger too fast. With thoughtful placement and scripting, motion sensors can turn a static display into an interactive haunted journey.
Lighting Tips for an Atmospheric Graveyard
Posted on 2025-05-22 21:47:53
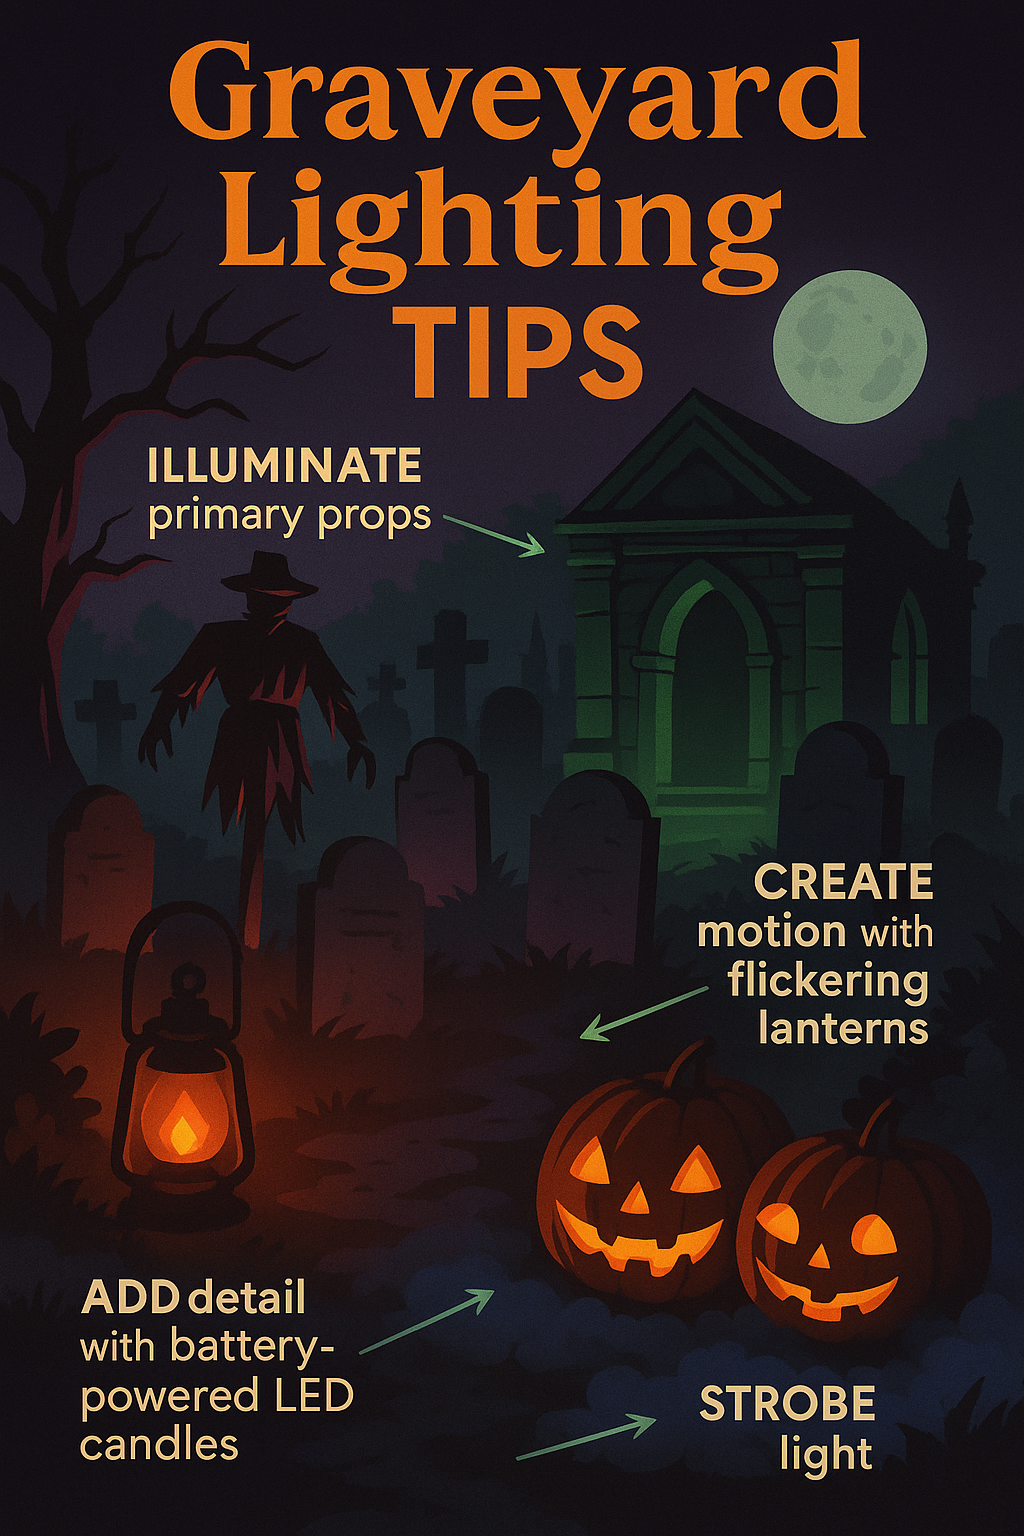
Lighting can make or break the atmosphere of your graveyard scene. Whether you’re using traditional spotlights, RGB floods, or flickering LED candles, your goal should be to highlight focal points, build depth, and add a sense of mystery. Start by identifying your primary props: tombstones, a mausoleum, a scarecrow sentinel. Illuminate them with a slight side-angle to create dramatic shadows. Use red or green backlights for contrast and silhouette. Add flickering lanterns to create motion and add realism. Battery-powered LED candles inside jack-o'-lanterns or skulls are great for adding detail. Try hiding a strobe behind fake shrubbery or low walls for lightning effects. Avoid lighting everything too brightly. Keep some elements in shadow. Use fog to catch light beams and add volume to the scene. Low-placed lights that shine upward can make statues or ghosts appear more menacing. Link your lighting to the Portal’s control system. With scripts, you can create light shows, timed pulses, or reactive flashes triggered by sound or motion. Ultimately, your lighting should guide the eye, enhance the spookiness, and support the narrative of your haunt. Experiment, take pictures, and adjust until it looks great both in person and on camera.
Integrating AI Vision Sensors into Your Haunt
Posted on 2025-05-22 21:47:53
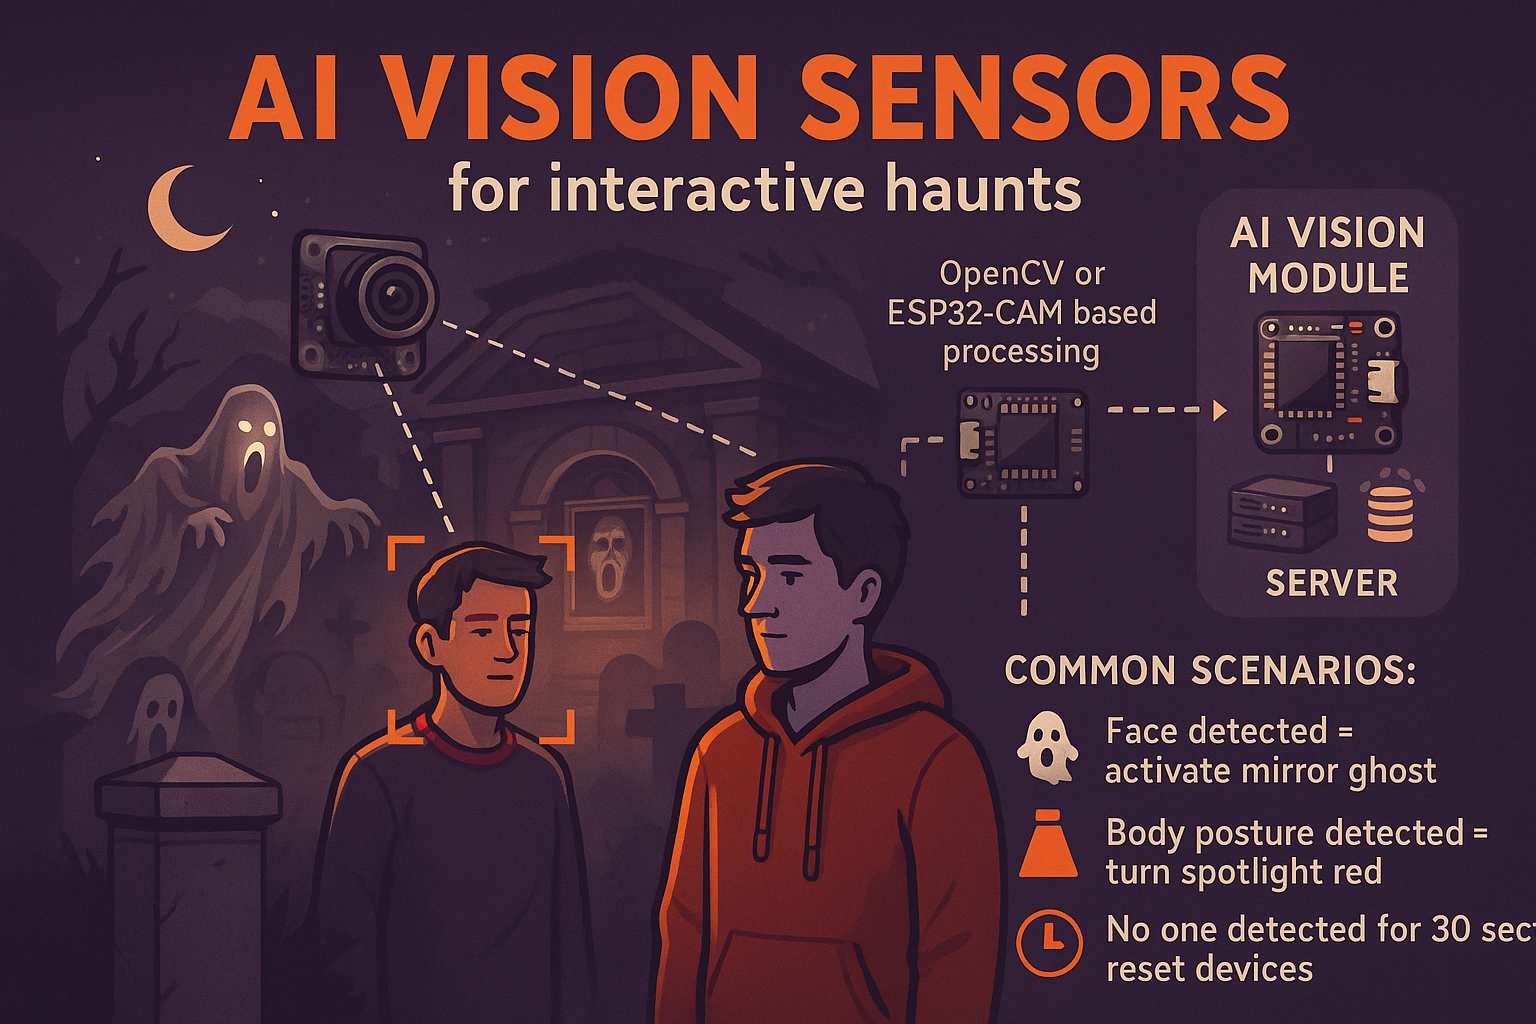
AI vision sensors are the future of interactive haunts. These devices go beyond simple motion detection—they can recognize shapes, faces, even costumes. With an AI camera integrated into your Halloween Portal, you can create more intelligent, targeted effects. Imagine a ghost animatronic that only rises when a guest wearing red enters the zone, or a portrait that only screams when someone walks directly in front of it. Most AI vision modules use OpenCV or ESP32-CAM based processing. The sensor sends data back to your server, where your scripts can interpret triggers based on recognition events. Common scenarios include: - Face detected = activate mirror ghost - Body posture detected = turn spotlight red - No one detected for 30 sec = reset devices Be sure to test in low light. Many AI modules are sensitive to lighting conditions. Use ambient light sources to maintain consistent visibility. Privacy is key. Make it clear that footage is not stored and is only used for in-scene interaction. AI sensors should enhance the experience, not intrude. With vision-based triggers, you add layers of depth to your scenes. It creates a sense that the haunt is aware, watching, and responding uniquely to each visitor.
Top 5 Mistakes in Halloween Automation (and How to Avoid Them)
Posted on 2025-05-22 21:47:53
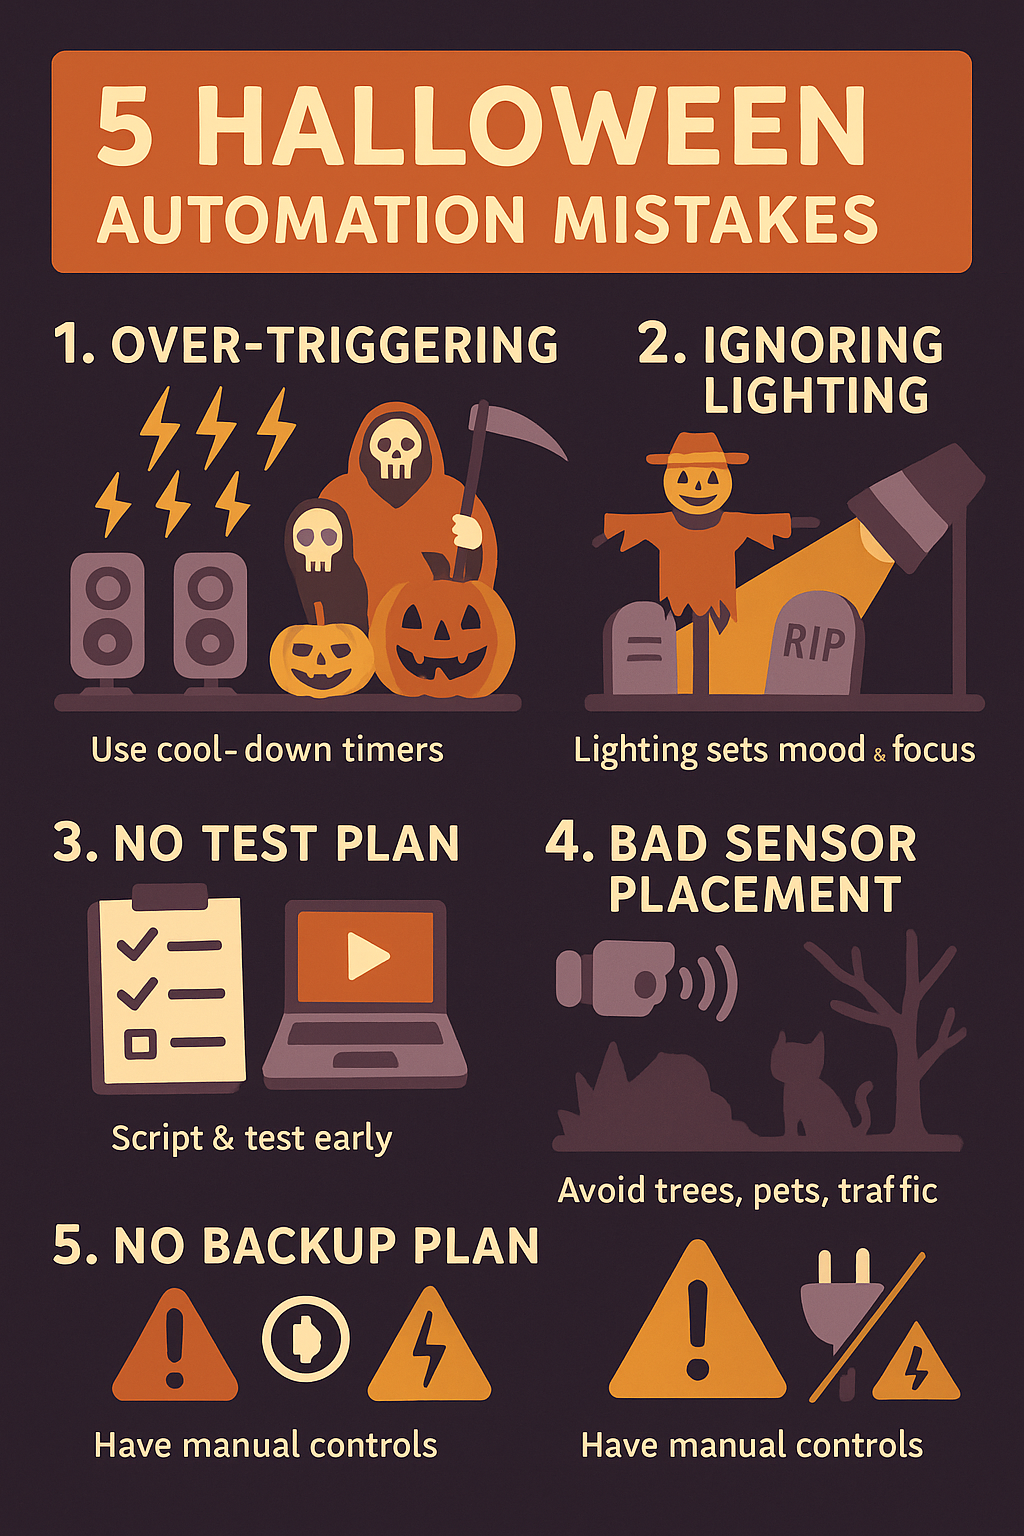
Halloween automation is exciting, but even seasoned haunters can make mistakes that weaken the impact or break the immersion. Here are the top 5 mistakes—and how to avoid them. **1. Over-triggering**: Devices that activate too often become predictable. Use cool-down timers or logic conditions to keep things scary but not spammy. **2. Ignoring lighting**: Many focus on props and forget the lighting. Lighting sets mood and focus. Without it, scares lose impact. **3. No test plan**: Testing during setup night is too late. Script and test each sequence in advance. Use the preview mode and logs in the Portal. **4. Bad sensor placement**: Motion sensors near trees, pets, or traffic cause false positives. Mount them carefully, and test under real-world conditions. **5. No backup plan**: Power loss, WiFi issues, or device failure happen. Have a manual control or default state for each prop. Avoiding these mistakes means your automation will be more reliable, more immersive, and less stressful to maintain. Planning ahead ensures your guests enjoy the fright — and you enjoy the night.
Help System and Blog Now Online!
Posted on 2025-04-28 17:45:00

Need help navigating this haunted house of tech? We’ve launched two new features: - Help Center: Filtered by subscription level, articles explain device registration, scripting, and APIs. - Blog Section: You’re reading it! Admins can now post progress updates like this one from the dashboard. Both systems are powered by database-backed article storage and are styled with spooky flair.
WebSocket Integration Now Live!
Posted on 2025-04-20 14:00:00
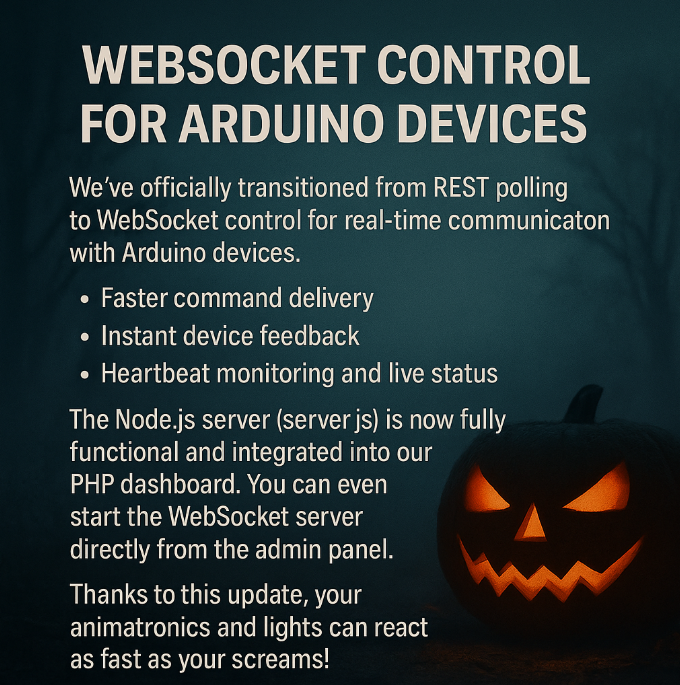
We've officially transitioned from REST polling to WebSocket control for real-time communication with Arduino devices. This means: - Faster command delivery - Instant device feedback - Heartbeat monitoring and live status The Node.js server (server.js) is now fully functional and integrated into our PHP dashboard. You can even start the WebSocket server directly from the admin panel. Thanks to this update, your animatronics and lights can react as fast as your screams!
Introducing the Halloween Device Control System
Posted on 2025-04-15 10:00:00
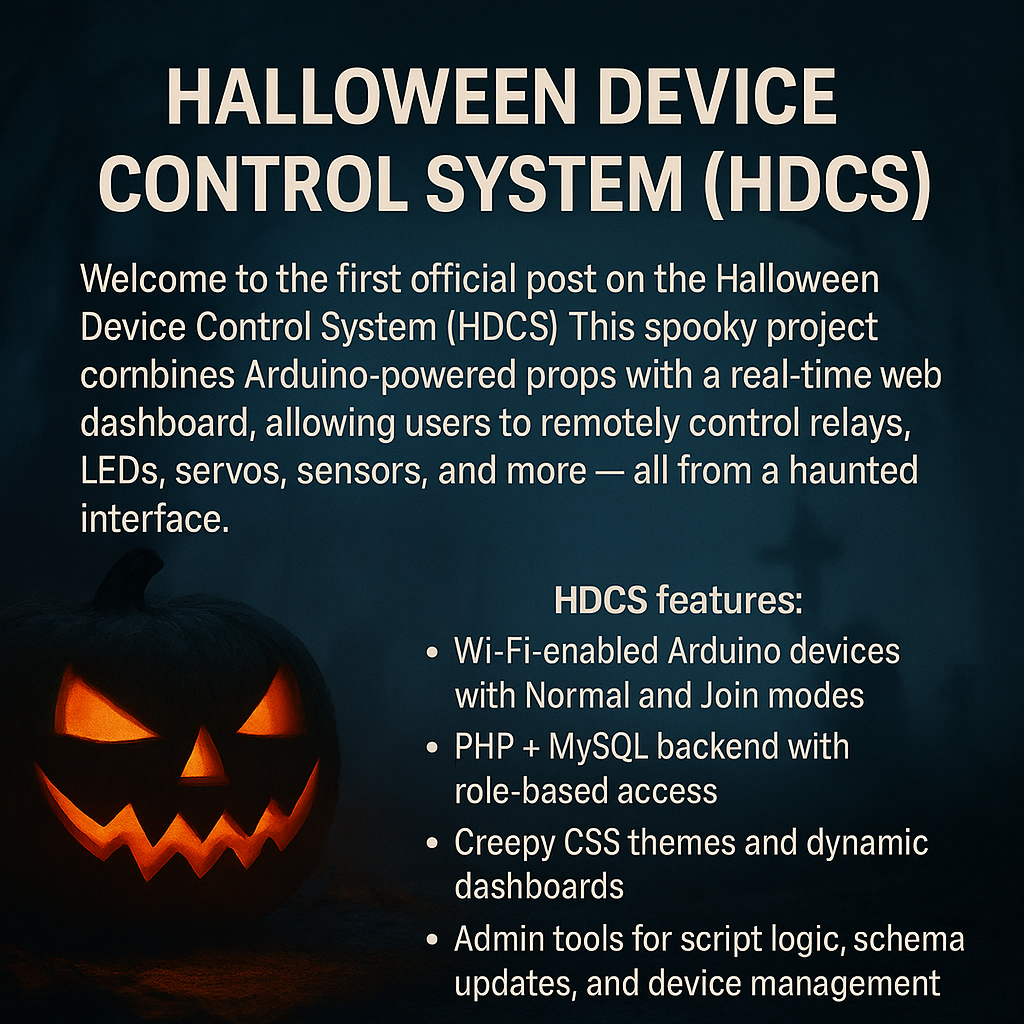
Welcome to the first official post on the Halloween Device Control System (HDCS)! This spooky project combines Arduino-powered props with a real-time web dashboard, allowing users to remotely control relays, LEDs, servos, sensors, and more — all from a haunted interface. HDCS features: - Wi-Fi-enabled Arduino devices with Normal and Join modes - PHP + MySQL backend with role-based access - Creepy CSS themes and dynamic dashboards - Admin tools for script logic, schema updates, and device management We’re starting with foundational infrastructure but aiming to build the most customizable haunted control platform out there. Stay tuned for spine-chilling progress!